Showing posts with label DIY. Show all posts

Wednesday, November 2, 2011

My 30-Before-30


image via

I have heard a lot about these kinds of lists, and I thought it would be great to put one together!  In case you haven't heard about it, the gist of it is to compile a list of all the things you want to do/experience/accomplish before your 30th birthday.  Some people do them right after they turn 20 and give themselves a decade (their lists usually have more difficult goals on them), but a lot of people do what I'm doing - they make their list the day after they turn 29 in an effort to make their last year as a 20-something more meaningful and productive. 

Basically, I just want to make sure I don't turn 30 and say, gee, I wish I had done that in my 20's.  So, without further ado...here is my list:

  1. Run a half-marathon
  2. Start a retirement account
  3. Get paid for photography  (one photo, one session, whatever...)
  4. Sew an outfit I'd wear in public
  5. Take Nash to see the snow
  6. Bake and decorate a multi-layer ombre cake
  7. Capture a great "fireworks" photo
  8. Take part in a haunted house
  9. Go on a big family vacay
  10. Visit a foreign country (kind of a gimmee since my unit is going to Japan in Jan)
  11. Start a business
  12. Get paid to design something (biz cards, flyers, logos, invitations, whatever...)
  13. Take a real roadtrip somewhere new and random
  14. Can something I grow or make myself
  15. Try bikram yoga
  16. Begin composting
  17. Kick my sugar habit
  18. Set up and maintain a photo archive system
  19. Do a mud/fun run with a group of friends
  20. Go on an adults-only cruise
  21. Complete a 30-day photo challenge
  22. Buy a new house (near a playground)
  23. Master the perfect sourdough bread recipe
  24. Start a family tradition
  25. Perform a full pull-up unassisted (might be easy for some, but I've never been able to do it)
  26. Meet Giuliana Rancic and tour the E! Networks building (ok, this may be dreaming)
  27. Build Bubs a sand box from scratch (no plans, no kits)
  28. Donate 10 hours of time to either a kids' charity or an animal shelter
  29. Learn how to swim
  30. Have an awesome 30th birthday party
Ok, there it is, people.  In black and white.  Guess that means I have to stick to it, huh?  This is harder than New Year's Resolutions!!  Wish me luck!
Click To Vote For Us @ Top Baby Blogs Directory!

Friday, November 26, 2010

Jewelry DIY

I am kind of in love with this blog called ...Love Meagan.  She takes a pic of her outfits and then tells you about all the pieces that she used.  She also alters a lot of her stuff and even creates a bunch of pieces herself AND shares the tutorials with you.

I had been dying to try some of her jewelry tutorials so I figured now or never.  The first one I wanted to try was her Pearl and Ribbon Necklace.  Here is a shot of her piece:
I decided to try mine using a slightly larger pearl and a sheer, organza ribbon.  It was quite tedious as I had to pull the pearls tight while trying to maneuver the needle and thread through the bunched up ribbon, but it turned out amazing!

I love that you can tie it at different lengths for different looks!  And I bet you can do this with other large beads and ribbon for a more edgy, less motherly look.

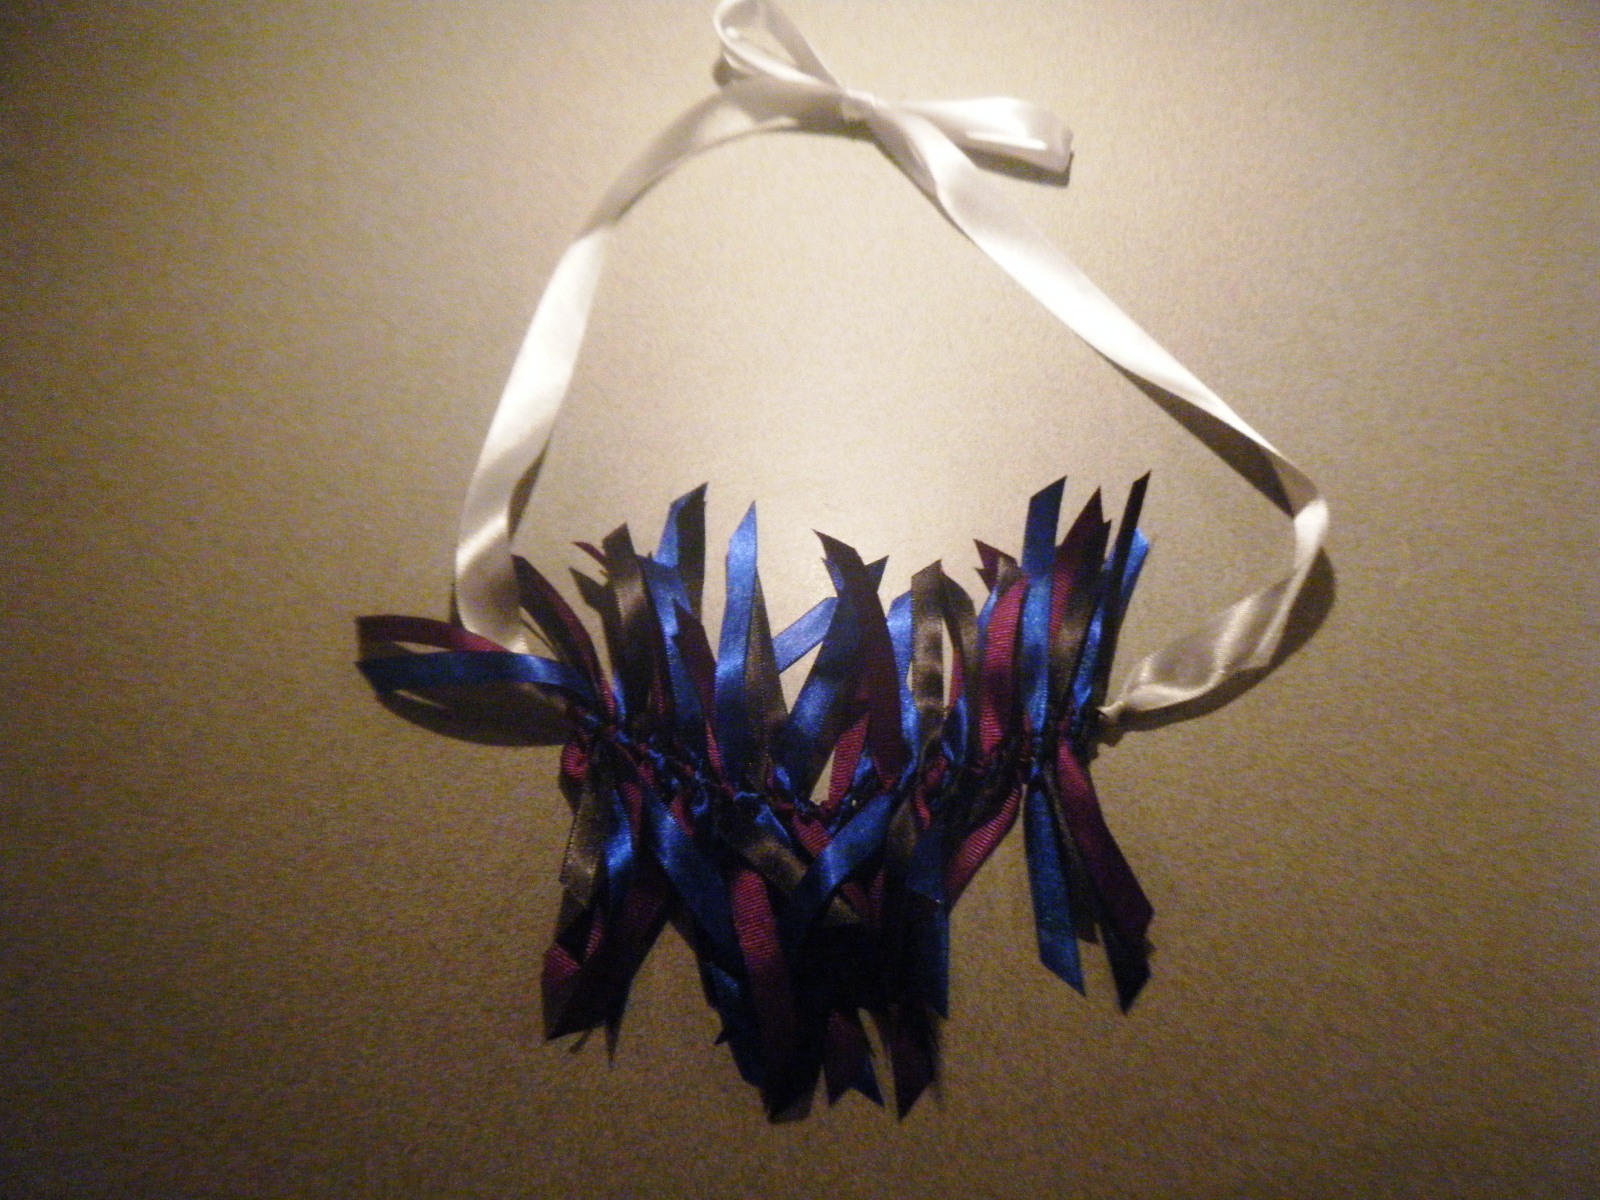
I also wanted to try her Knotted Ribbon Statement Necklace tutorial, so I bought a bunch of ribbon back when I bought my holiday items.  Here is a shot of her piece:

I think she used 5/8" and 7/8" ribbon for hers, but I accidently bought 5/8" and 3/8", so my design came out much smaller than hers.  I may go back and add some more ribbon to fill it out and make the overall design wider.  Here is the final product:

As a necklace
As a belt - the bump kind of hides it but you get the idea.
Overall, I am loving all of her ideas and cannot wait to try her Asymmetical Fur Vest tutorial.  I just need to find some faux fur I like...they had some at Hobby Lobby, but it was a bit crazy for me.  I really want a light cream-colored, feminine fur for mine, so keep your fingers crossed!

Wednesday, November 24, 2010

Nursery Paper Craft

Since I tend to be overly organized and type A, I realized that Joe (and whoever else comes over to help when the baby is born) may need some help finding all of Baby Nash's things if I'm not around.   I decided to make these little tags to hang from each of his drawers...which I think will not only help others find things, but also let them know where to put things back.  This way I don't go looking for bibs and instead find blankets.

So I started out in powerpoint and created a rough template for business cards, which I deemed about the right size and already perforated.  I am sure you can use one of the templates in Word, but I wanted to play around with some graphics and Word can be so frustrating when it comes to free design.

I designed each card, entered the appropriate label for each drawer, and printed them out (after I printed a tester on plain paper and made sure it lined up with the perforations on the cards).  Then I used some fancy scissors to clip off the corners with no graphics (just to give it a little flair).  I punch small holes and tied some ribbon and ta-da!  Little labels!

For the bins with no handles, I simply used some double-sided tape to adhere them right to the bins (no holes needed).
 Here is a shot of the changing table/dresser set up we have.  We are still waiting on our custom nursery bedding (to include a matching changing pad cover), so that is still pretty plain.  Also, see that orange cord hanging on the left side of the pic?  That's from his ceiling light and Joe is supposed to get up there and hard-wire it so we won't have that cord hanging. 

 Also, I finally hung up the mobile I made forever ago.  I had seen mobiles around that were basically just a bunch of circle-shaped pieces of paper cut out and strung in a pattern, but they were being sold for like $100!  I couldn't see myself paying for it, so I thought I would try making it myself.  Here is how it turned out!


I used the inner circle of a few embroidery circles for the hangers, clear jewelry thread (kind of like fishing line), and a small circle cutter to punch a ton of circles out of black, gray, orange, and white cardstock.  It was insanely tedious because I had to thread the line through one hole at a time, tying a knot in between each one to keep them separate but not TOO separate.  Took me a few days, but I managed it.  Then I tied all the different sized strings of circles to the wooden hangers and then had to attach each hanger to the other ones!  I needed Joe's extra hands for this (he held the top hanger will I adjusted and tied the strings for the lower hanger).  Finally, we installed a simple hook into the ceiling and tied the whole thing to the hook using the same jewelry thread.  Phew!!!  So cute, but a lot of work.  Did save me at least $70, even considering that I had to buy the circle puncher for $15.

Sunday, September 5, 2010

Wall Mural

We are pretty close to wrapping up the nursery project.  Just a few more little tweaks and we are set!  Then we just need some diapers and a baby!  Pretty excited, I must say.  We spend a lot of time just sitting in the room, imagining what it's going to be like to have this little man.

Wanted to share some pics of one of the DIY projects I did for the nursery, although I have more I will add later.

Here are some shots of the wall mural I painted.

Basically, I bought some different sized rings and circles from Michael's, which I used to draw a mock up of the design onto some posterboard.  When I was satisfied with the design and the colors, I used the circles to draw the design on the wall.  Then I painstakingly painted the design onto the wall using basic acrylic craft paint.  The orange and gray took several coats, so I was there for awhile.  We hung some letters I painted for his name and presto!  We have a finished wall!  It all looks really good in the room.  Need to take some better pictures...during the day so we have some better lighting.

The other projects I've done, which I will show later, are some closet dividers, hand-painted drawer knobs, and a sweet paper mobile.  All of which go along with our circles/dots theme, so it's pretty cute.  Can't wait for the whole room to be done so we can take the final pictures and share with everyone!

Tuesday, July 6, 2010

Collecting Stuff

I thought I needed to do a post with all of the pcitures of "stuff" we have accumulated already.  We are in the process of redoing the nursery, but don't know the gender yet, so it's a bit slow.  We hope to find out in the next few weeks, so the planning (and shopping) can really begin!

So, my sister had a girl about 6 years ago and gave me a ton of stuff!  Most of it is sizes 3-6 years, so I can't use it yet.  What I think we are going to do is keep the stuff I know I want, then see if Joe's niece will wear any of the other stuff.  She is turning 3 this summer, so it should be just perfect for her.

Here's some of the stuff I kept from that pile (most of which is stuff I bought her for birthdays, x-mas, etc...)

Tuesday, August 4, 2009

Shoe Updates

Woooooo!!! My black diamond Swarovski rhinestones came in, so I was able to finish my shoes. Although they didn't fit in the design as well as I'd hoped, a little bit of spacing all around made it look great. Here are the pics:


Back View


Front View


Side View of Heel


The "i do" on the bottom

It came out pretty good I think...and they are unique! I still need to get some sweet-looking foot pads for the inside so my feet won't ache. Will also need to remember to pack bandaids because they may rub me the first time I wear them.

Apparently my garter set has shipped, but I haven't gotten it yet.

Also, Lulusplendor is working on the hair piece I requested. She sent me a mock-up of the design:

This is the overall design...isn't it beautiful?! Except this is raw brass, as she explained to me, so the finish will look like this:


I think this will work beautifully with the dress and the whole look. I can't wait to see everything all done! And the clip is only going to cost me $62, so I'll get the whole lot, custom, for less than I could get some other boring vintage jewelry.

Thursday, July 30, 2009

Shoes

So, my beautiful shoes got dyed last week. They look amazing! I can't wait to bedazzle them! I have all the Swarovski crystals and the glue, I am just working through how I want to design them.

Here they are with no crystals.


I am searching the internet for some design ideas, but it seems like most shoes just have the entire heel covered in crystals. I am not sure I want to go that route.


Photo found here

Or this one

Photo found here

I am leaning more towards something like the second one, since I don't really want to cover the entire heel. Not that it looks bad, but since my shoes are bright yellow, I was thinking something more subtle.
Related Posts Plugin for WordPress, Blogger...