Showing posts with label crafty. Show all posts

Wednesday, June 15, 2011

Night Home Alone

Usually Joe and I are sitting on the couch right about now, enjoying some quiet time after Muffin has gone to bed. Tonight, however, Joe had to work. A little something called Chippendales is at the County Line tonight, so it's just me and the kiddo at home. And said kiddo is in bed...attempting to sleep.

So what is a mama to do?  Make baby food!!


Of course, I could have started some of the sewing projects I've got waiting in the wings.  Been meaning to make some baby pants, some more binkie clips, and a few other things.

Today at lunch I stopped off at Jo-Anns to pick up some new fabric to make baby slings out of.  I bought a nice one a while back, but it ended up shrinking a bit when I washed it.  Because it was just the perfect size when I bought it, it is now just too small.  So I thought I would make one...seems easy enough.    Here's what I got:
  I got two different ones because while I was there I got the bright idea that I ought to try to make a ring sling too!  So I got my fabric and went back to work.

I ended up ordering some awesome colored aluminum rings online, so just waiting for them to come in.  Then I need a free night to do some sewing.  Might be awhile, since we have so much to do to the house still.  But I feel the fabric calling my name...

Friday, November 26, 2010

Jewelry DIY

I am kind of in love with this blog called ...Love Meagan.  She takes a pic of her outfits and then tells you about all the pieces that she used.  She also alters a lot of her stuff and even creates a bunch of pieces herself AND shares the tutorials with you.

I had been dying to try some of her jewelry tutorials so I figured now or never.  The first one I wanted to try was her Pearl and Ribbon Necklace.  Here is a shot of her piece:
I decided to try mine using a slightly larger pearl and a sheer, organza ribbon.  It was quite tedious as I had to pull the pearls tight while trying to maneuver the needle and thread through the bunched up ribbon, but it turned out amazing!

I love that you can tie it at different lengths for different looks!  And I bet you can do this with other large beads and ribbon for a more edgy, less motherly look.

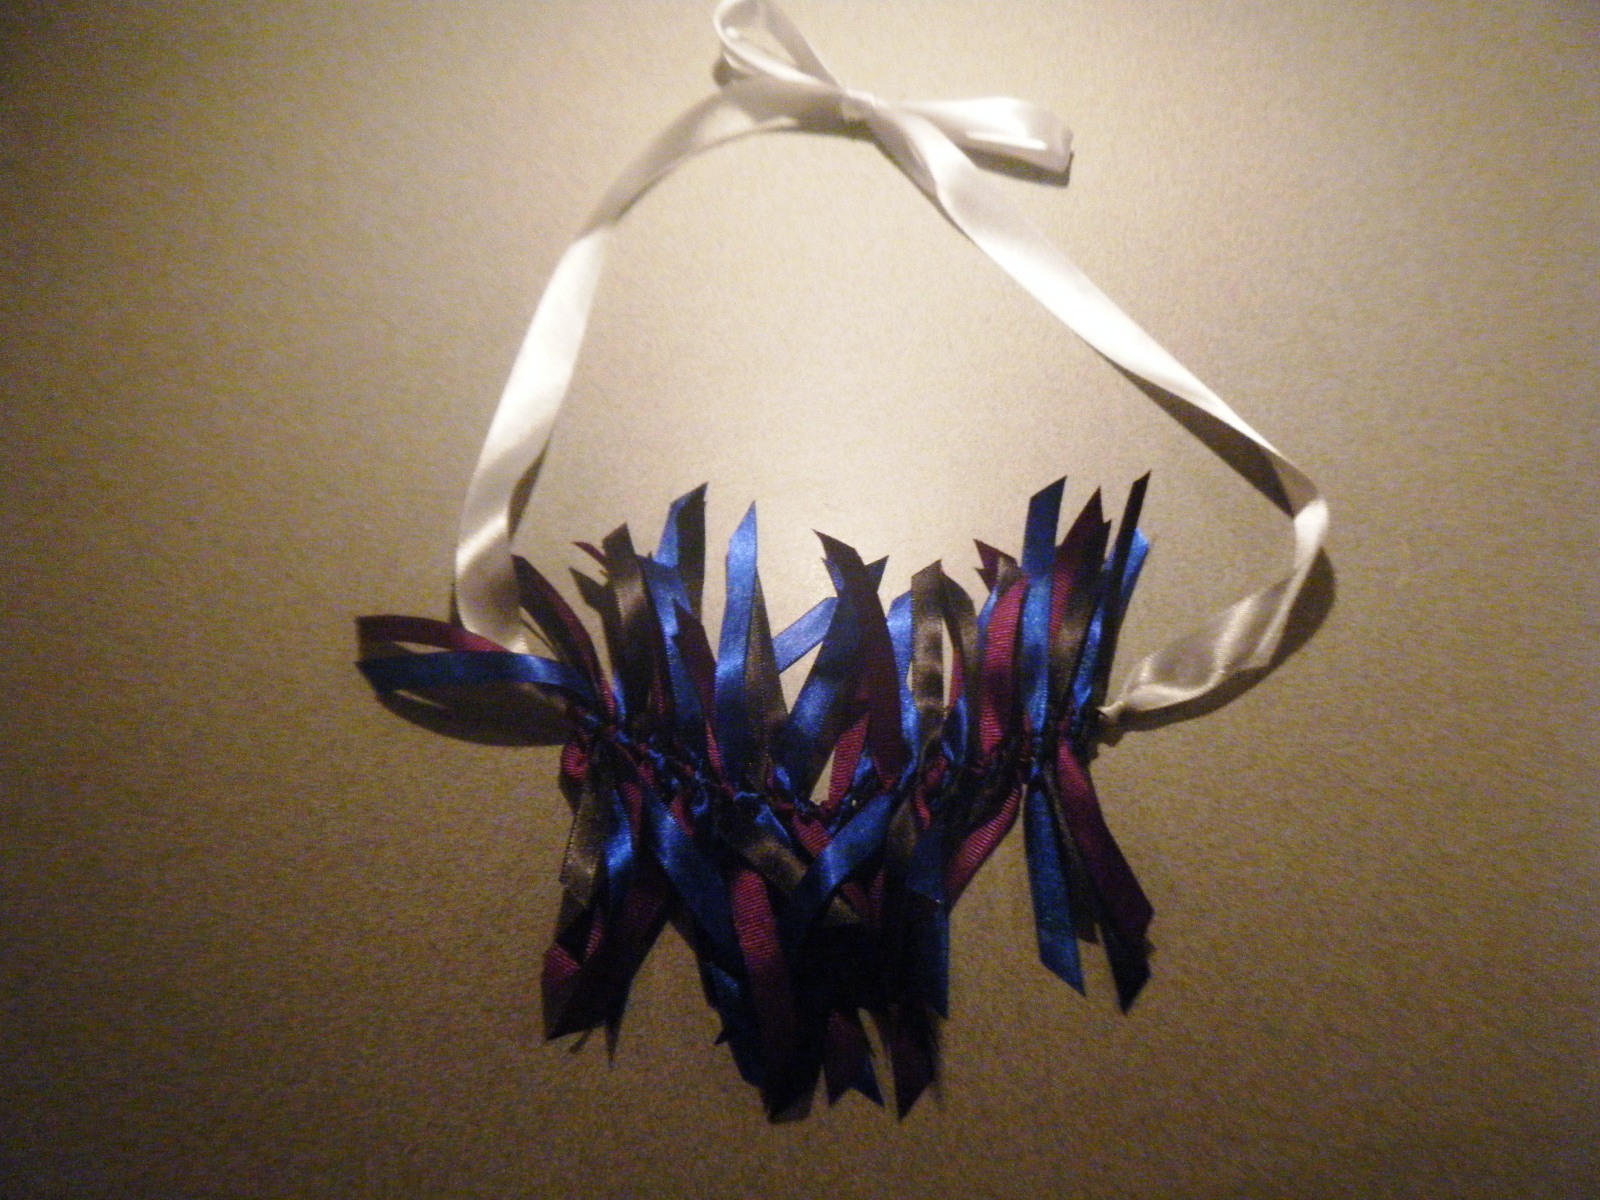
I also wanted to try her Knotted Ribbon Statement Necklace tutorial, so I bought a bunch of ribbon back when I bought my holiday items.  Here is a shot of her piece:

I think she used 5/8" and 7/8" ribbon for hers, but I accidently bought 5/8" and 3/8", so my design came out much smaller than hers.  I may go back and add some more ribbon to fill it out and make the overall design wider.  Here is the final product:

As a necklace
As a belt - the bump kind of hides it but you get the idea.
Overall, I am loving all of her ideas and cannot wait to try her Asymmetical Fur Vest tutorial.  I just need to find some faux fur I like...they had some at Hobby Lobby, but it was a bit crazy for me.  I really want a light cream-colored, feminine fur for mine, so keep your fingers crossed!

More Baby Projects

Since I am back on my sewing kick, I decided to knock out a few more baby projects...including several that have been sitting around waiting for me to address them.

First up was a pillow case.  You see, they say you should bring your own pillows to the hospital so you are more comfortable and you won't have to go without if it's uber busy and they are short on pillows.  But, you aren't supposed to bring white ones, since these will be easily confused with the hospital ones.  So I toyed with the idea of buying some brightly colored pillow cases that would cheer me up (hopefully) and provide some comfort while I am in labor and recovery...but then I came across this tutorial on my new favorite blog, Make It and Love It and thought, I can do this!  And I have a ton of this silky soft knit fabric from our wedding photobooth background that would work perfectly and be unmistakably ours!  It was definitely challenging working with something that large (cutting, pinning, and sewing), but I managed to knock one out!
I still need to make one more (which I already have cut, just have to pin and sew), so I'll save that for another day. 

I also finished up the other two Wee Wee Wigwams I had started a while ago (if you recall, I accidently cut whole circles instead of half circles, so I ended up with more than I meant to).  Here is his complete collection, unless I get bored of those designs and decide to create a few more.


Also, I bought this book a while back that is filled with all kinds of cute baby projects, but I had yet to try making any of them.  There are definitely some booties, burp cloths, and a hat I want to make, but I figured I would start with some a little different.  I decided to try making a fabric block for Nash to play with.  I basically cut 4" squares out of 4 coordinating cotton fabrics and two 4" squares of yellow fleece I bought from the remnants bin.  Then you sew it all together (minus one side), stuff with filling, and then hand sew the last side.  Here she is:
You can see from the pic that it is slightly larger than you would expect (or at least, larger than I expected).  I already cut out enough squares to make another one, so we're stuck with the larger size, but I think it should be more like 3" squares.

Finally, I have made two different bibs in the last few weeks and wanted to share them with you.  The first one I made using a pattern from this site.  However, I think it came out too small.  Perhaps this is due to my inability to maintain a seam allowance or if I just screwed something up, but I didn't like how it turned out.  So, I borrowed one of the bibs I had bought from Target and used that as a pattern.  This one turned out much better, and I even appliqued on a little tie design that I got from this site. 

Here you can see the two bibs side-by-side and notice the size difference.

Something to keep in mind when using patterns in the future...I really should use my judgment once I see the pattern and decide if it's going to work or not BEFORE I start sewing.

Time to Decorate the Household!

Since this is my very first Christmas actually living here, I was so excited to begin decorating.  I must say, it took some convincing to get Joe to haul all the Christmas stuff out and begin decorating yesterday (he even googled when decorating is traditionally done), but in the end my enthusiasm prevailed and we started the festivities.

First we put up the tree, minus the decorations (this always takes more than one day for us, even when I'm not 9 months pregnant and practically worthless).

Joe Assembling Our Tree

Scooter Really Wanted to Help Out
Our Tree - Minus the Decorations

Then I began working on spreading out the household decorations and knocking out some holiday crafts I'd been dying to do. 
Our "Mantle"
I wanted to create some sort of mantle display, despite the fact that we do not have a mantle or a fireplace.  However, we have this cute little table right below our TV in the family room that works perfectly AND we have a "fireplace" DVD that crackles and pops and looks pretty damn real.  So we're set!  I found this sign on another blog, so I took to recreating it in Photoshop, but added in the line that reads "December 25th" because I wasn't digging the spacing without it.  Here it is up close:
I also created this paper ball from another blog, which took forever, but it ended up being perfectly cute for this display.  Can't seem to locate the tutorial, but will credit it once I do.  Here's the paper ball resting on top of our old vase:

It's basically just a foam ball that I bought at Hobby Lobby covered with little tissue paper circles that I bunched up and hot glued all over it.  It was tedious, but the end result is quite beautiful.

I also want to add some holiday spirit to our couch, which is currently sporting a "south-western-ish" vibe with red, brown, and brown accents.  So I decided I would sew some Christmasy slip covers for all the non-red pillows using the tutorial I found here. 

 I added the little flower rosette in the top corner because I felt like it was too much of one pattern (but wanted to make sure I could do the simple pillow cover before I attempt any fancier detailing). 

This is much easier than sewing a pillow because there's no hand-stitching the opening, it's just an envelope type closure that encases the pillow.  Here's a view of the back of the pillow where you can see the little flap.
I decided to steal another idea from the same blog that I got the subway art idea from, so I also bought some foam cone-shaped trees from Hobby Lobby and covered them with Modge Podge and glitter (one red, one silver) and set them near the pool room.  They are so pretty and festive!  Will take a pic of them when that whole display is complete.

Wednesday, November 24, 2010

Nursery Paper Craft

Since I tend to be overly organized and type A, I realized that Joe (and whoever else comes over to help when the baby is born) may need some help finding all of Baby Nash's things if I'm not around.   I decided to make these little tags to hang from each of his drawers...which I think will not only help others find things, but also let them know where to put things back.  This way I don't go looking for bibs and instead find blankets.

So I started out in powerpoint and created a rough template for business cards, which I deemed about the right size and already perforated.  I am sure you can use one of the templates in Word, but I wanted to play around with some graphics and Word can be so frustrating when it comes to free design.

I designed each card, entered the appropriate label for each drawer, and printed them out (after I printed a tester on plain paper and made sure it lined up with the perforations on the cards).  Then I used some fancy scissors to clip off the corners with no graphics (just to give it a little flair).  I punch small holes and tied some ribbon and ta-da!  Little labels!

For the bins with no handles, I simply used some double-sided tape to adhere them right to the bins (no holes needed).
 Here is a shot of the changing table/dresser set up we have.  We are still waiting on our custom nursery bedding (to include a matching changing pad cover), so that is still pretty plain.  Also, see that orange cord hanging on the left side of the pic?  That's from his ceiling light and Joe is supposed to get up there and hard-wire it so we won't have that cord hanging. 

 Also, I finally hung up the mobile I made forever ago.  I had seen mobiles around that were basically just a bunch of circle-shaped pieces of paper cut out and strung in a pattern, but they were being sold for like $100!  I couldn't see myself paying for it, so I thought I would try making it myself.  Here is how it turned out!


I used the inner circle of a few embroidery circles for the hangers, clear jewelry thread (kind of like fishing line), and a small circle cutter to punch a ton of circles out of black, gray, orange, and white cardstock.  It was insanely tedious because I had to thread the line through one hole at a time, tying a knot in between each one to keep them separate but not TOO separate.  Took me a few days, but I managed it.  Then I tied all the different sized strings of circles to the wooden hangers and then had to attach each hanger to the other ones!  I needed Joe's extra hands for this (he held the top hanger will I adjusted and tied the strings for the lower hanger).  Finally, we installed a simple hook into the ceiling and tied the whole thing to the hook using the same jewelry thread.  Phew!!!  So cute, but a lot of work.  Did save me at least $70, even considering that I had to buy the circle puncher for $15.

Sewing Projects Update 2!

My next sewing project was one I had considered buying, but then I noticed this tutorial and thought, OMG, how easy and perfect! 

Project 5:  Wee Wee Wigwam (or Pee Pee Teepee, if you prefer)
All I needed was some cotton fabric and some soft fabric for the lining ( I used some white fleece like material I got out of the scrap bin at Joann's).

I accidently traced a whole circle onto my fabric and lining before realizing I only needed a half circle, but I ended up messing up the first one, so I had another half circle to try again!

Here is what my finished product looks like:

Yayyy!!!  Now I just have to make a few more so I still have one while one is in the wash!

Poject 6:  Tissue Case
I don't usually carry tissues around with me, but I figure I should...especially with a baby on the way.  So I decided to try this little tutorial.  My first obstacle was that the measurements were in cm, not inches.  So I tried to convert, but ended up with weird measurements, so I rounded up.  Well, it turns out my case is a little big.  Here is what it looks like:

I later found another tutorial with measurements in inches AND that featured a slightly overlapping lip (this one busts open and the tissues are exposed.  I ended up keeping my first one (for now), but adding some thin elastic and a button along the top to keep it closed up.  May try making this again in the future.
Project 7: Boxy Little Pouch
This was the original tutorial that my makeup pouch was based on (according to that website), but it comes out smaller and more boxy than the makeup pouch did, so I wanted to try it out.  Again, this called for a 12" zipper, but only used a 9" one and didn't have to trim it at all.  Other than that, all I needed was two kinds of fabric (outer and liner) and some interfacing (I chose a quilt batting for this one, just to experiment with it).
Here is my finished product:

I think it's super cute!  You can see I am not that skilled at sewing straight lines, as the pouch is a little wonky, but I can improve on that for sure.  Again, though, this tutorial leaves the raw edges inside the pouch, so I have to figure out a way to get rid of those.  Notice I used two different fabrics for the front of the pouch on this one!  Trying to test out my limits!  It is a little off-center and I only did one side to avoid having to line up both sides evenly (yikes)!
Project 8: Ruffled Checkbook Cover
Here is the tutorial I used for this one.  I wanted to create a cute little ruffled one like I found on the Pleated Poppy, so the actual tutorial I used told me how to do the ruffle part.  I chose to do a plain red fabric on the outside and a bright dot fabric on the inside and for the ruffle.  Here she is!
Issues I had:
  • The size of the cover did not allow the vinyl part of my original checkbook cover to fit inside (which I don't think it's supposed to).  However, I did not like how floppy the whole thing was without the vinyl, so I just cut my original vinyl cover down a bit to fit inside.  This of course covered up the pretty lining fabric, so maybe the best bet is just to include some sturdier interfacing or start with a sturdier fabric. 
  • Also, I used black thread (being lazy so as to not have to wind a new bobbin with red thread), so it would obviously look better with coordinating thread.
So cute though!  Even Joe thought this was awesome.

Project 9:  Zipper Coin Pouch
This is the last project I am going to list here, but I have so many more brewing, I can't wait to share!  This is the same general idea as the other zippered pouches, but smaller and with no boxy angles cut into the corners.  I also included a small piece of ribbon so I could hook the whole thing up to my keychain and throw it in my purse.

You can see from the top picture that I did my measurements a bit off (it really shouldn't be that tall, but more like those small little pouches you see in stores).  But it does its job just perfect!  Only other thing of note is that I used a 4" zipper here so as to not have to trim anything (I still don't feel advanced enough for those kinds of things).

I think my next sewing projects will be:
  • Envelope-style pillow slipcovers in Christmas fabrics (need to jazz up the house)
  • A new case for my phone (current one uses felt and is a wee bit small, so will redo with fleece and proper sizing)
  • Ribbon belt for Baby Nash (I did this, but only with one layer of ribbon and it really needs a double-sided pattern, so reworking).
  • Water bottle sling
  • Some kind of hobo-esque purse (going to consult several tutorials and just wing it)
  • Soft minky blanket for Nash
Then I may start trying to make some gifts with my new found skills!

Update on Sewing Projects

I've been a sewing machine these last few weeks!!  You wouldn't believe all the stuff I've made (and all the times I totally screwed something up)!  I am going to try to show you everything, with links to the tutorials or images that I used as inspiration.  First I hit up Joann's and got some supplies!


Project 2:  Pacifier Clip
Although I am not sure we will use paci's, I thought this was a cute and easy project to try (and I've seen tutorials all over the place). 

I bought some ribbon, some thin elastic, and a suspender clip and I was ready to go!  Here is my finished product!

For the next one, I think I will double up the ribbon to have the pattern on both sides and give it some body.  I just wasn't comfortable with doing a serge or zigzag around the edges this early on in my sewing skills. hehe...

Project 3: Small Zippered Pouch
I was really eager to try this, so I bought a bunch of zippers in different sizes and colors.  Oddly, the tutorial I used called for a 12" zipper that you were then supposed to trim.  Well I couldn't find a 12" one, so I bought some 9" ones and they worked perfectly...no trimming needed!  Here is the fabric I chose for the outside and the lininng:


I used a pinkish zipper and some fusible interfacing to give it some body, and this is what I ended up with!
Super cute!!  My only complaints are this:  You can see the raw edges on the inside.  I've seen some other tutorials that put these together differently in such a way that I think would help hide this edge.  Also, I used the wrong fabric for the applique "T" as you can totally see through it the flower pattern from the other fabric. Noted for next time.  But other than that, love love love!

Project 4: Diaper/Wipes Case
I really want to make things I am going to use, so why not make a sweet little puch to throw into my diaper bag to keep all those little things corralled!  I used the basic tutorial found here, with some little tweaks of my own and this is what I ended up with:
I love the fabric!  It's pretty, but still kind of masculine too, so that when I hand the pack to Joe to do diaper duty, he won't be carrying around some flowery pink thing!  I know he'll appreciate it.  The star was a last minute addition (since I am still learning how to make things unique and special) made of white felt that I appliqued using heat n bond. 

Those are just as few of my recent projects...will post the others in another entry - just to break things up a bit.

Tuesday, November 16, 2010

Sewing and Baby-Making

It's been a while since my last blog because it's been the craziest three weeks, I swear.  So much has happened.  Birthdays, holidays, work stuff, friend get-togethers...and lots of swelling, aching, and complaining in between!


What a belly!

We are right at the 34 weeks mark, so things are getting close.  We've started our childbirth classes and will soon migrate to the once a week doctor's visits we've heard so much about.  We still have another ultrasound on the 29th to determine if our baby is still a chunkster, and to see if we might induce or if he might come early (come on, kid!!).  I am more miserable than ever, fighting bouts of pre-partum depression, and then conversely wearing myself out with projects, nesting, errands, etc...  What a crazy time, I tell ya.

One of the things I have been really caught up in lately is sewing.  I am so eager to get moving and learning on my new sewing machine, but I am a little frustrated.  I want to make these little bags, purses, bibs, etc... but it's like you need something different for each one.  So I'm always running around trying to find these things, and ended up wasting my time driving up to Viera (Hobby Lobby was closed and Michaels' sewing section is PATHETIC).  So I still need to make a trip down to Joann's to get zippers and whatnot and then I can begin!!  I've only made one thing so far (successfully).  I wanted to make a little case for my phone, and since it didn't need require anything other than fabric and some felt, I was ready to go.  Here is the fabric I chose:

Then I went with some black felt (mainly because it's what I had lying around) for the inside lining.
I put both of them together and began sewing.  I used a tutorial for an iPhone that I found here.  It was pretty helpful, although I had to guess at my measurements since I was doing it for a much fatter Blackberry.  So, here was the final product!

My only complaint is that I did in fact mess up the measurements a bit (I think mostly because I have not perfected my ability to sew an exact seam allowance yet).  So it's a little snug width-wise and a little long length-wise.  So I think I am going to try making another one, with hot pink felt next time!

I also tried making some simple envelope type bags for whatever (again, because they didn't need anything other than fabric), but I didn't use a tuturial and ended up sewing it completely closed (twice).  So, I have not quite mastered the technical understanding of the steps yet, so I will still to tutorials until I do.   So much I want to make though!

Sunday, September 5, 2010

Wall Mural

We are pretty close to wrapping up the nursery project.  Just a few more little tweaks and we are set!  Then we just need some diapers and a baby!  Pretty excited, I must say.  We spend a lot of time just sitting in the room, imagining what it's going to be like to have this little man.

Wanted to share some pics of one of the DIY projects I did for the nursery, although I have more I will add later.

Here are some shots of the wall mural I painted.

Basically, I bought some different sized rings and circles from Michael's, which I used to draw a mock up of the design onto some posterboard.  When I was satisfied with the design and the colors, I used the circles to draw the design on the wall.  Then I painstakingly painted the design onto the wall using basic acrylic craft paint.  The orange and gray took several coats, so I was there for awhile.  We hung some letters I painted for his name and presto!  We have a finished wall!  It all looks really good in the room.  Need to take some better pictures...during the day so we have some better lighting.

The other projects I've done, which I will show later, are some closet dividers, hand-painted drawer knobs, and a sweet paper mobile.  All of which go along with our circles/dots theme, so it's pretty cute.  Can't wait for the whole room to be done so we can take the final pictures and share with everyone!
Related Posts Plugin for WordPress, Blogger...